Installation
You can download Parley directly or install it from the Asset Lib in the Godot Editor.
Prerequisites
- Godot 4.4+ is installed.
Instructions
Option 1: Installing from the Godot Asset Lib within the Editor
- Select the AssetLib button at the top of the Godot Editor.
- Search for
Parleyin the search box. - Select the Parley plugin.
- Click
Install. This will kick off the download. - Complete the first time installation by following the first-time installation instructions below.
TipIf you experience compilation errors after downloading Parley, an easy way of rectifying this is to restart your Godot project. If the problem persists however, please raise an issue here.
Option 2: Download and install
- Download the compressed zip file from the Parley releases page on GitHub or from the Godot Asset Library.
- Extract the compressed zip file and place the
parleydirectory into youraddonsdirectory in your project. - Complete the first-time installation by following the first-time installation instructions below.
TipIf you experience compilation errors after extracting the Parley zip file, an easy way of rectifying this is to restart your Godot project. If the problem persists however, please raise an issue here.
First-time installation

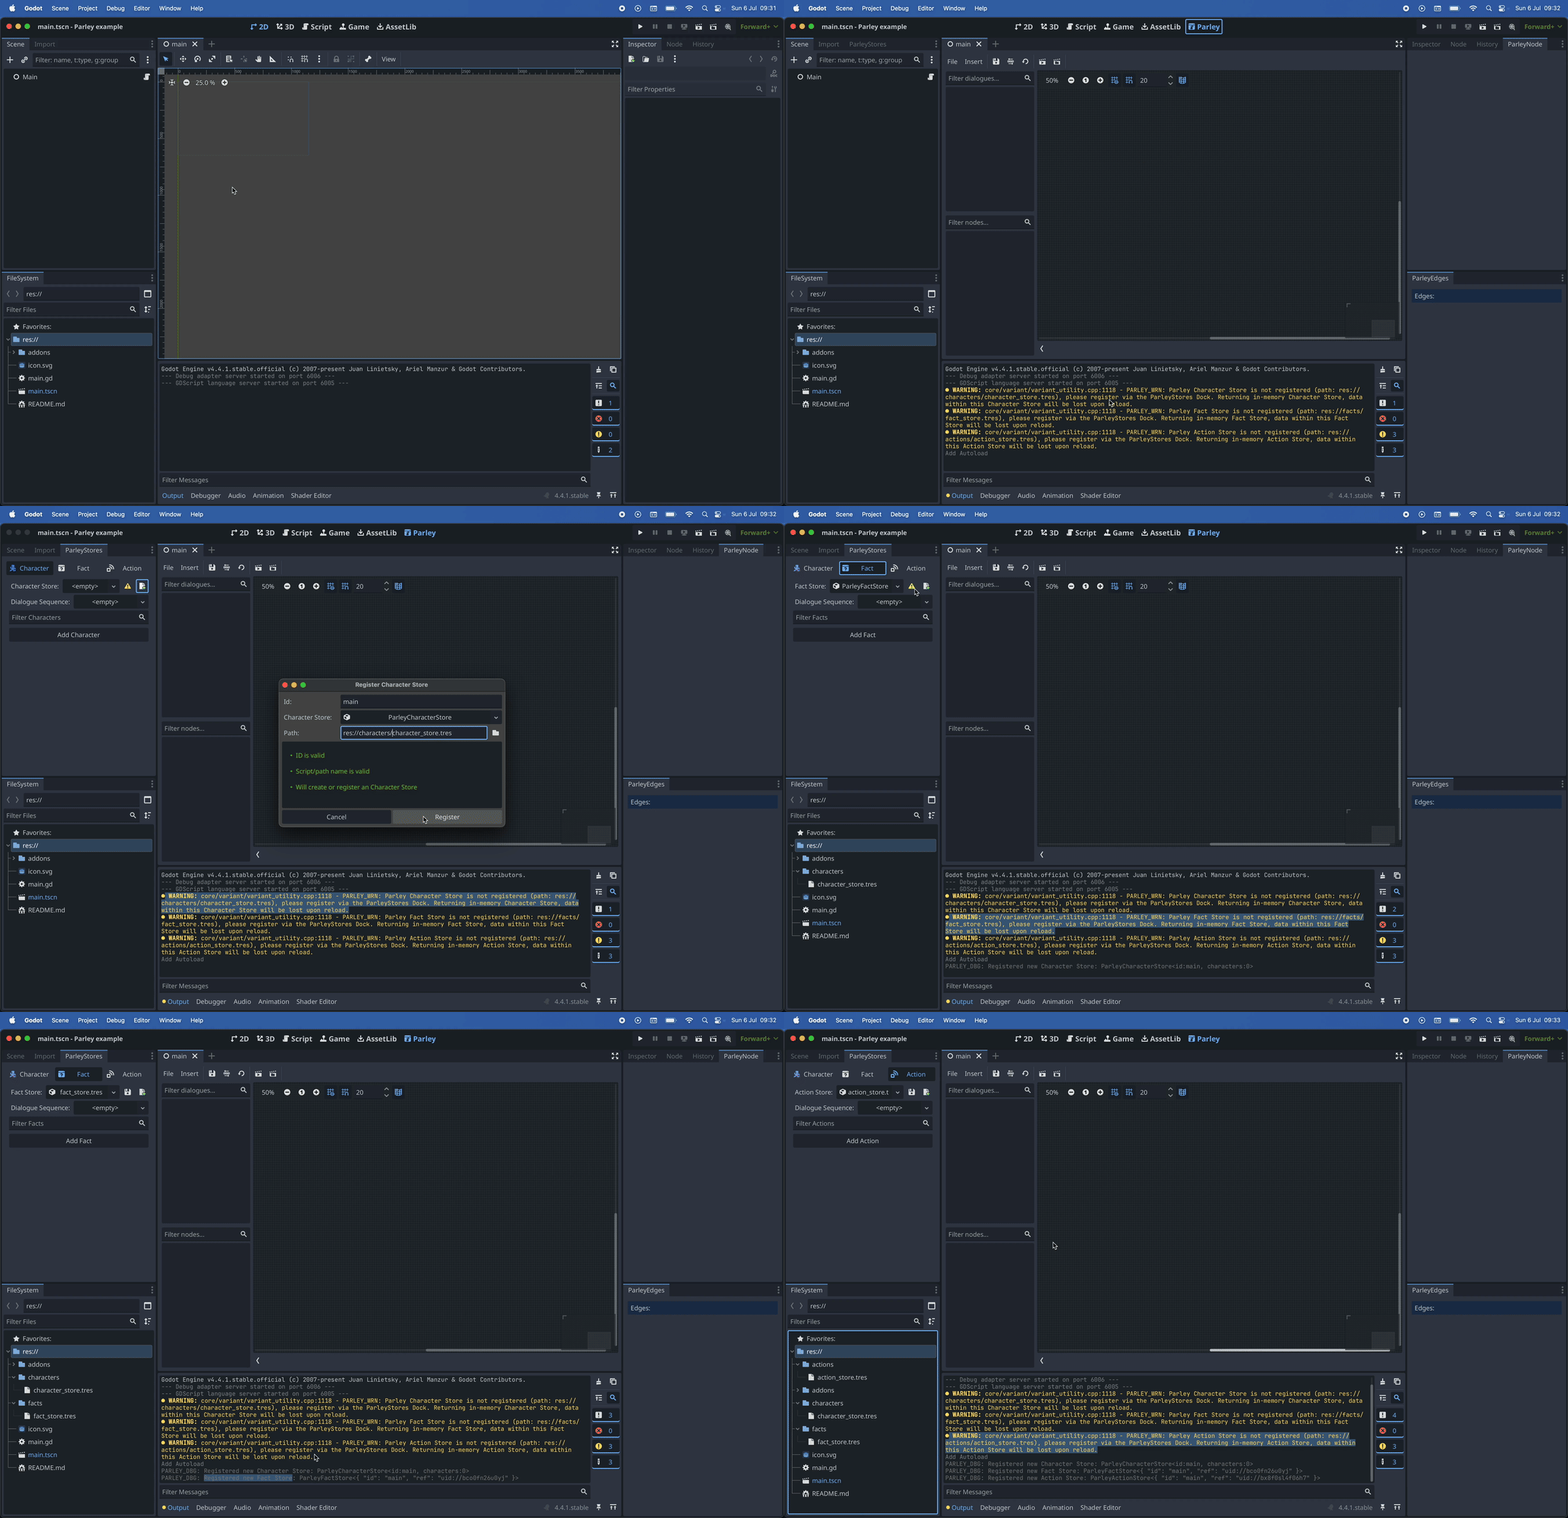
TipIf you’d like to access and follow along using the supporting video instead, please find the original mp4 here.
- Enable the Parley plugin for your project by navigating to:
Project->Project Settings->Pluginsand tickingEnabled.
WarningWhen you install Parley for the first time, the following Stores will need to be set up, otherwise you will receive some warnings in the Editor:
- Action Store
- Fact Store
- Character Store
You don’t need to add items to them at this point, just the presence of the stores is sufficient.
To resolve these warnings, follow the steps below.
- Navigate to the
ParleyStoresdock and select theCharactertab. - Click the
Create and register new Storebutton to open the Character Store registration modal. - Give the Character Store an ID. In our example, we call this:
main - Set the path where the Character Store resource will be saved. In our
example, we set this to:
res://characters/character_store.tres - Click:
Registerto save and register the Character Store. You should see the warning button disappear in theParleyStoresdock. - The Character Store is now set up and ready to be used. You can find out more about the Character Store here.
- Repeat the above steps for the Fact Store via the
Facttab in theParleyStoresdock. You can find out more about the Fact Store here. - Repeat the above steps for the Action Store via the
Actiontab in theParleyStoresdock. You can find out more about the Action Store here. - Now everything is set up, you can start creating Dialogue Sequences!